Plant Preview


Welcome to Plant Preview, a blog dedicated to helping gardeners learn about gardening techniques and preview new plant cultivars. Read about new plants here first and hear how your "comrades in compost" are making use of new plant introductions in their gardens and landscapes. Blog author Geri Laufer is a life-long dirt gardener, degreed horticulturist, author and former County Extension Agent. Plant Preview is copyrighted by Geri Laufer.

Tuesday, December 18, 2012

How to Make Homemade Satsuma Cider or Wine Mulls


Cider Mulls and Wine Mulls lend a festive  atmosphere to holiday gatherings. 

Directions: 
Pour a quart of cider or a bottle of light red wine into a saucepan,  add the Mulling spices attractively packaged in a Satsuma shell, and simmer gently for 15 minutes or so, until the house smells wonderful and the beverage tastes good! 

How To Make a Homemade Cider or Wine Mull

1. Cut Satsumas (such as Arctic Frost Satsuma PPAF by Garden Debut)  in half horizontally and eat the fruit, saving the shells


2. Dry the shells completely - I use the stove top and it takes about 3-4 days


3. Assemble ingredients for mulls: dark brown sugar, stick cinnamon and whole cloves. 

Stuff the dried Satsuma shells with brown sugar


4. After filling the dried Satsuma shells with brown sugar, decorate with the mulling spices: whole cloves and stick cinnamon. May also add whole allspice or cardamom if desired.


5. A dozen of the finest homemade Satsuma cider mulls


6. Close-up of cider mulls


7. For gift-giving or hostess gifts, wrap with cellophane or plastic wrap to display Satsuma Cider or Wine Mull, then tie tightly with cloth ribbon! 

Sending Merry Christmas wishes! 

Friday, December 7, 2012

Trying Winchester Gardens Fertilizer Spikes


Back in March I found Gerry Joeng’s post in the “Garden Industry Pro, Garden Media and Guru” LinkedIn Group, offering a free trial of some of the Winchester Gardens’ fertilizers and organics. While I am primarily an organic gardener, I thought I might give the products a try, so Gerry kindly sent me some packages.

Although I did not take photos, I did use Winchester Gardens Select Organics Herb Fertilizer on lemon verbena, heliotrope, patchouli and several varieties of lavender planted in May, and they did very well.

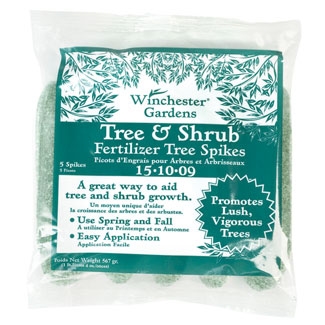
On my Knockout Roses, I decided to use three Winchester Gardens Tree & Shrub Fertilizer Spikes spaced equally around the root systems. Because I ran out of fertilizer spikes before I ran out of roses to try it on, the samples turned into a "non-scientific trial" with fertilizer and without. 

My original Pink and Red Knockout Roses were planted dormant in January from 3-gallon pots, three to four months before I got the fertilizer to try. My "control group" that received no fertilizer were transplanted from another spot in my garden in March, and although they were approximately the same size, there was a lag of two months in regard to root establishment before hot weather arrived in May.   

Delivery System:  I used my Dad’s gigantic, XL screwdriver to make holes for Tree and Shrub Fertilizer Spikes (April, 2012)  


I pounded each fertilizer spike into the soil at roots of Knockout Rose using a small sledgehammer; 3 per shrub. Roses were watered sporatically throughout the summer and fall. 


At the end of the growing season, the Red Knockout Roses that were fed with three fertilizer spikes each are large and bushy shrubs filled with flowers. Photo taken Nov. 24, 2012  (Orange Zinnias to the right were killed by the frost that following night.)


With 5-foot ruler: Pink Knockout Rose bush fed with 3 fertilizer spikes is full and filled with flowers. Photo taken today, Dec. 7, 2012 


With 5-foot ruler. Much smaller Pink Knockout Rose that was NOT fed (b/c I ran out of fertilizer spikes). Photo taken today, Dec. 7, 2012. The unfertilized rose bush was growing and flowering but are only about 1/3 the size. 


Another view of two of the smaller Pink Knockout Roses that did not receive fertilizer, photo taken today, Dec. 7, 2012. 

Winchester Gardens is having a Sweepstakes, so I entered and maybe I will win some more fertilizer! 

Thursday, December 6, 2012

After - Thanksgiving Pumpkins

Big old pumpkins on the side steps
The day after Halloween I gathered 3 huge pumpkins from the curbs in the neighborhood, and enjoyed them through Thanksgiving as decor.


unbaked pumpkin pies, ready for oven
They were made into pies with homemade crusts[ raw pies pictured here before baking:


the seeds were salted and baked 


I washed the pulp from the seeds, salted them with a Tablespoon of kosher salt per pan and baked them at 300 degrees F for 30 minutes, stirred them and baked for 10 more minutes.
Roasted pumpkin seeds 


pumpkins tossed on top of compost
Next, the shells went into my little red Corona wheelbarrow on the way to the compost pile.

We made a tidy compost pile by folding 2 sheets of concrete reinforcing grid into L-shapes and creating a square.


Compost is filled in autumn
Later after I cut back the daisy mums that had enlivened the fall garden!

Pink and yellow daisy mums, Nov. 2012
Those mums had looked like this  during November:

Both the pumpkin shells and the mums will recycle minerals and nutrients back into the garden in the form of compost.

Wednesday, December 5, 2012

Hand-Made Wreath

The Atlanta Chapter (Chattahoochee Unit) of The Herb Society of Atlanta has a wreath-making workshop that is a benefit of membership on the first Saturday in December each year.

This year I made 2 wreaths using leaves of Teddy Bear Magnolia PP13049, dried blue flower heads of Nantucket Blue Hydrangea and bright red berries of Christmas Jewel Holly PP14477. 

An 18-inch purchased straw wreath base covered with silvery Spanish Moss was my foundation, and I used crimped floral pins to attach the leaves, flowers and berries. 


A red velvet Christmas bow completed the wreath, hanging outside of our storm door.